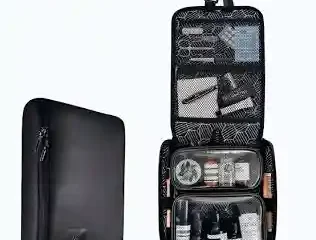
To stop toiletries leaking in your luggage, don't rely on the bottle alone. Build four layers, one for each way a leak gets out: a sound seal on the container, a secured cap, a separate bag around anything that can pour, and a wipeable kit bag around all of it. A leak then has to beat every layer to reach your clothes. Most advice covers only the first two layers, and those are the two that stop helping once a bottle has already failed.
Last checked: 11 September 2026. The screening rules quoted here come from the Transportation Security Administration (TSA) and apply at airports in the United States. Other countries set their own rules, and airlines add theirs. Check tsa.gov and your airline's baggage page before you pack.
Why One Leaking Bottle Ruins the Whole Bag
A leak is rarely a flood. It is a few milliliters of shampoo or oil that escape slowly over several hours while the suitcase lies on its side. Two things turn that small volume into a ruined bag.
The first is spread. Liquid runs downhill to the lowest seam, and fabric wicks it sideways from there. By the time the case is opened, a spill from one bottle has soaked into everything that touches that corner.
The second is pressure. A container that was sealed at ground level can be pushed from the inside when the air around it changes, and a closure that was only just holding can give way. The mechanism, and why some closures cope with it better than others, is covered in our explainer on why travel bottles leak on a plane.
So there are two separate jobs. One is keeping the liquid in the bottle. The other is keeping it contained when the bottle fails anyway. One barrier cannot do both jobs.
The Four Layers, and What Each One Stops
| Layer | What it is | What it stops | What it cannot stop |
|---|---|---|---|
| 1. Container seal | The bottle's own closure, filled and closed properly | Routine seepage from a sound bottle | A cracked bottle, a worn gasket, a cap knocked loose |
| 2. Cap security | Film under a screw cap, tape over a flip cap, a locked pump | A closure that opens or backs off in transit | Liquid escaping from a split in the bottle wall |
| 3. Item bag | A sealed plastic bag around each item that can pour | One failed bottle spreading to its neighbors | A bag that is punctured or not closed |
| 4. Kit bag | A toiletry bag with a wipeable, seam-sealed lining | Whatever gets past layer 3, and outside water | Nothing stops a spill from a bag left open |
Read the table from right to left. Each layer covers what the one before it cannot. That is the whole method. The rest of this page explains how to set up each layer so it does its job.
Layer 1: A Container That Actually Seals
Most leaks start at the closure, so the first layer is about how the bottle is filled and closed, not which bottle you buy.
Wipe the threads and the rim before closing. A film of product left on the threads keeps the cap from seating, and it dries into a crust that holds the cap slightly open. If the closure has a gasket or a valve, check that it sits flat and is not torn. The step-by-step method, including how full to fill, is in our guide on how to fill a travel bottle so it doesn't leak.
Match the closure to the product. A thin liquid in a flip cap is the combination most likely to escape, because a flip cap is a hinged opening held shut by friction. A screw cap or a disc top is a firmer seal for anything runny. We compare them in pump, flip cap or disc top: which closure survives a suitcase.
Match the material to the contents, too. Some products, oils in particular, can degrade certain bottle materials over time, and a softened bottle wall is a leak you cannot fix with tape. What should never go into a soft bottle is covered in what you should not put in a silicone travel bottle.
Layer 2: Securing the Cap So It Cannot Open
The second layer assumes the seal is fine and guards against the closure coming open.
Screw caps. Open the bottle, lay a small square of plastic film over the opening, and screw the cap back down over it. The film becomes a second gasket, and if the cap backs off a quarter turn, the film is still across the opening. This is the most repeated tip on the pages that rank for this topic, and it earns its place.
Flip caps. Close the cap and run a strip of tape across the hinge and the lid. Friction alone keeps a flip cap shut, and tape takes away the lever that knocks it open.
Pumps. Many pumps lock by twisting the head down into the collar. If yours does not lock, a strip of tape around the neck or a pump cover does the same job.
Aerosols. The federal hazardous materials rule for passengers, 49 CFR 175.10(a)(1) (read September 11, 2026 at Cornell's Legal Information Institute), requires that the release device (the button or nozzle) of a toiletry aerosol be protected, by a cap or other suitable means, against accidental release. That applies to carry-on and checked bags. A missing cap on a can of dry shampoo breaks a rule, and it also causes leaks.
Layer 3: One Bag Around Each Item That Can Pour
This is the layer most people skip, and it does the most work, because it assumes a bottle will fail and limits the damage to that one item.
Not everything needs its own bag. Sort by what the item can do if it fails:
- Bag separately: thin liquids, oils, anything decanted into a container you have not used before, anything with a pump, and anything half used, which has more air inside and product dried on the threads.
- Bag in a group: thick creams in screw-top jars, and tubes with screw caps.
- No bag needed: solids such as bar soap in a case, stick deodorant, solid shampoo and powder products.
In a carry-on, the 3-1-1 rule already sets up a version of this layer. At the time of writing, TSA's liquids rule page allows liquids, gels, aerosols, creams and pastes in containers of 3.4 ounces (100 milliliters) or less per item, and TSA's 3-1-1 FAQ states that each passenger is limited to one quart-size bag. That quart bag holds all your liquids together. Inside it, wrap the one or two most leak-prone bottles in film so a failure stays small. The full rule is set out in the TSA 3-1-1 rule, read carefully.
In a checked bag, TSA's liquids page states that items in containers larger than 3.4 ounces or 100 milliliters go in checked baggage. The quart-bag limit does not apply there, so you can give every pourable item its own bag. Large bottles of shampoo and conditioner benefit most, because they hold the most liquid to lose.
One detail helps a great deal. Press the air out of the bag before you seal it. A bag full of air balloons and puts strain on its own seal, and a flat bag keeps a spill in a thin film instead of letting it slosh.
Layer 4: The Kit Bag, and Where It Sits
The last layer is the toiletry bag and where it sits in the suitcase.
What matters in the bag is the inside, not the outer fabric: a lining you can wipe clean, and seams that are taped or welded rather than just stitched. A stitched seam is a line of needle holes. The zip and the seams decide whether a bag holds a spill far more than the outer fabric does.
Placement matters about as much as the bag. Pack the kit upright if the suitcase allows it, so caps face up and liquid sits at the bottom of each bottle, away from the closure. Keep it away from hard, heavy items that could press on a soft bottle when the suitcase is stacked or squeezed into an overhead bin.
What Not to Bother With
It is easy to over-engineer this. Some honest trade-offs:
- Bagging every item wastes space and time. Solids and sealed tubes rarely leak. Put the layers around the items that can pour.
- Taping a bottle that has a cracked body does nothing. If a bottle has split, stress-whitened or softened, replace it.
- Tighter is not always better. Forcing a cap past its stop can crack the thread or squash the gasket out of place. Snug is the aim.
- You may not need to buy anything. Film, tape and a few reusable zip bags will do most of what a new kit would, around the bottles you already own.
The Day You Fly Home
The trip home is where layered packing most often breaks down. You pack in a hurry, bottles are half empty, threads have product dried on them from a week of use, and the zip bags have been thrown away.
Take two minutes before packing to wipe each thread and rim, re-seat the film under screw caps, re-tape flip caps, and put each pourable item back into a bag. Anything nearly empty with a crusted closure is the likeliest leak in the kit. If you can finish it, or throw it away before packing, that risk is gone.
If It Leaks Anyway
Layers make a leak smaller. They cannot make one impossible. If a bag arrives with a spill inside it, the layers tell you where to look. A wet item bag with a dry kit bag means layer 3 held. A wet kit bag means the leak got through layer 3, so check that bag's seal and look for a puncture before you use it again.
Rinse and dry every layer before it goes back into use. A zip bag or kit bag packed away damp starts to smell, for the same reason a bottle stored wet does: moisture, residue and no airflow.
FAQ
What is the best way to stop toiletries leaking in a suitcase?
Use more than one barrier. A properly sealed container, a secured cap, a separate plastic bag around each item that can pour, and a wipeable kit bag each stop a different kind of failure, so a leak has to get past all four to reach your clothes.
Does plastic wrap under the cap really work?
It works on screw caps. The film acts as a second gasket and still covers the opening if the cap loosens. It does nothing for a flip cap, which needs tape across the hinge instead, and nothing for a cracked bottle.
Should toiletries go in a carry-on or a checked bag to avoid leaks?
Either can leak, so choose by the rules and the volume. At the time of writing, TSA limits carry-on liquids to containers of 3.4 ounces (100 milliliters) or less, all in one quart-size bag per passenger, and directs larger containers to checked baggage. Check tsa.gov and your airline before you fly, because rules change.
Do I need a separate bag for each toiletry going through TSA?
Not under the rule as we read it on 11 September 2026. TSA asks for one quart-size bag holding your liquids. Wrapping the riskiest bottle inside that bag is a packing choice, not a TSA requirement.